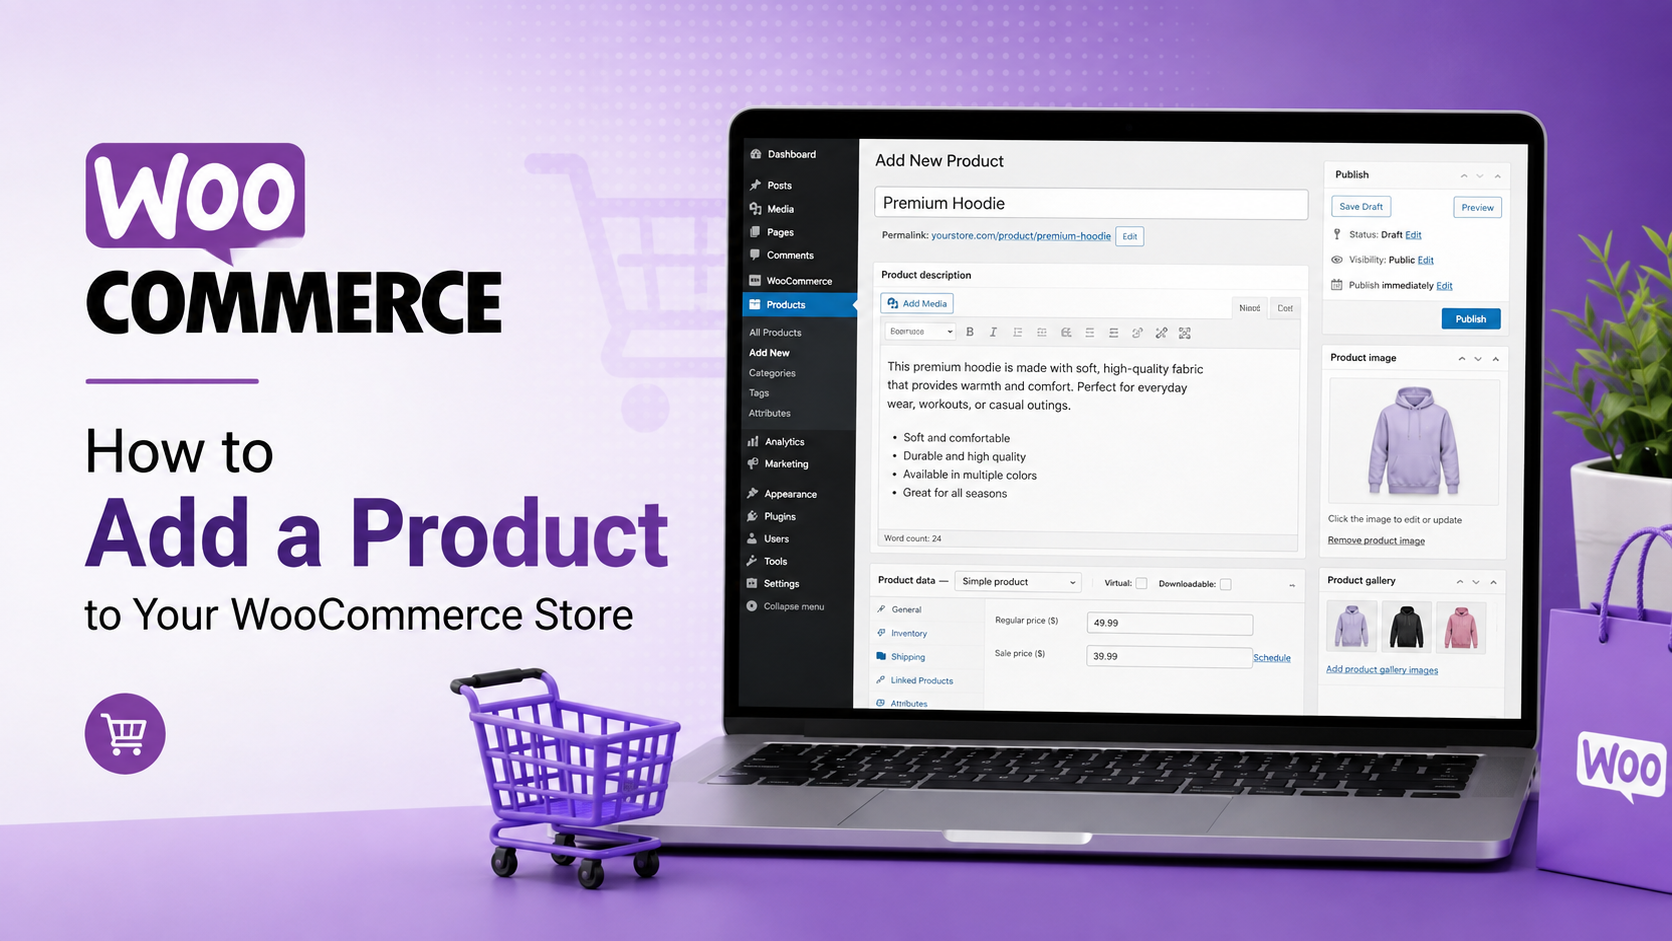
Adding products to your WooCommerce store is an important part of managing an online business. WooCommerce makes it easy to create product listings with images, descriptions, pricing, inventory, and shipping information.
In this guide, we will walk you through how to add a physical product to your WooCommerce store.
Step 1: Log Into Your WordPress Dashboard
To add a new product, first log into your WordPress website dashboard.
Your login page is usually located at:
yourwebsite.com/wp-admin
After logging in, you will be taken to your WordPress dashboard where you can manage your website, products, orders, and settings.
Step 2: Navigate to Products
From the left-hand menu, go to:
Products → Add New Product
This will open the WooCommerce product editor where you can add all the information about your new product.
Step 3: Add Your Product Name
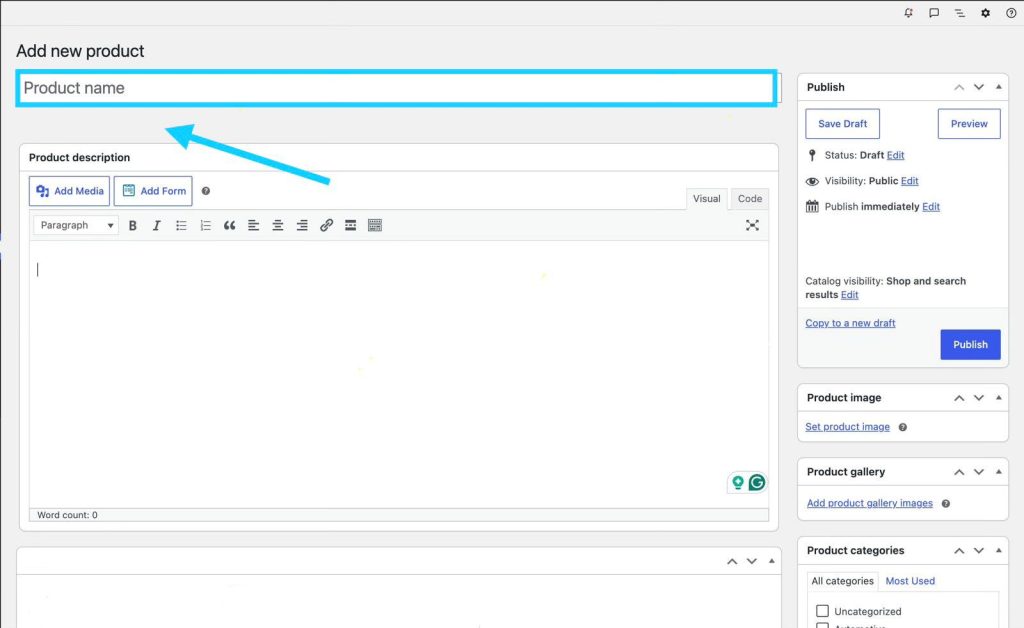
At the top of the page, enter your product name.
Your product name should clearly describe what you are selling. A good product title helps customers understand the product and can also improve your visibility in search engines.
Example:
Good: Stainless Steel Water Bottle 750ml
Poor: Bottle
Try to include important details such as the brand, model, size, or main feature when applicable.
Step 4: Add Your Product Description
WooCommerce includes two different product description areas: the long description and the short description.
Long Product Description
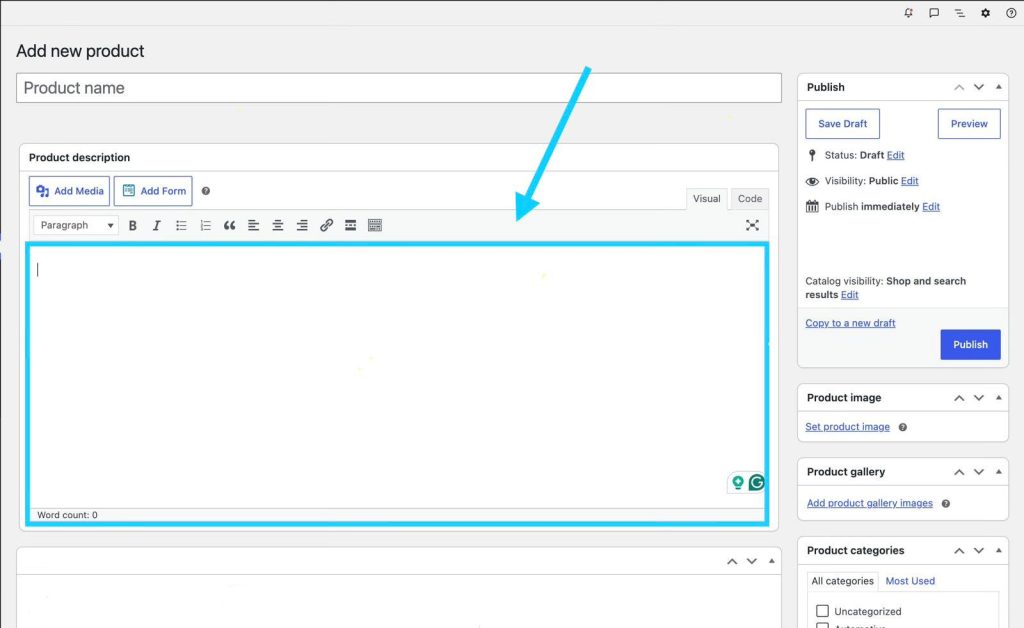
The long description is the main product description that appears in the product tabs or below the product information section, depending on your theme.
This section should include detailed information about your product, such as:
- Product features
- Benefits
- Materials
- Specifications
- Dimensions
- Care instructions
- Additional product details
A detailed product description helps customers understand the product and can improve their buying decision.
Short Product Description
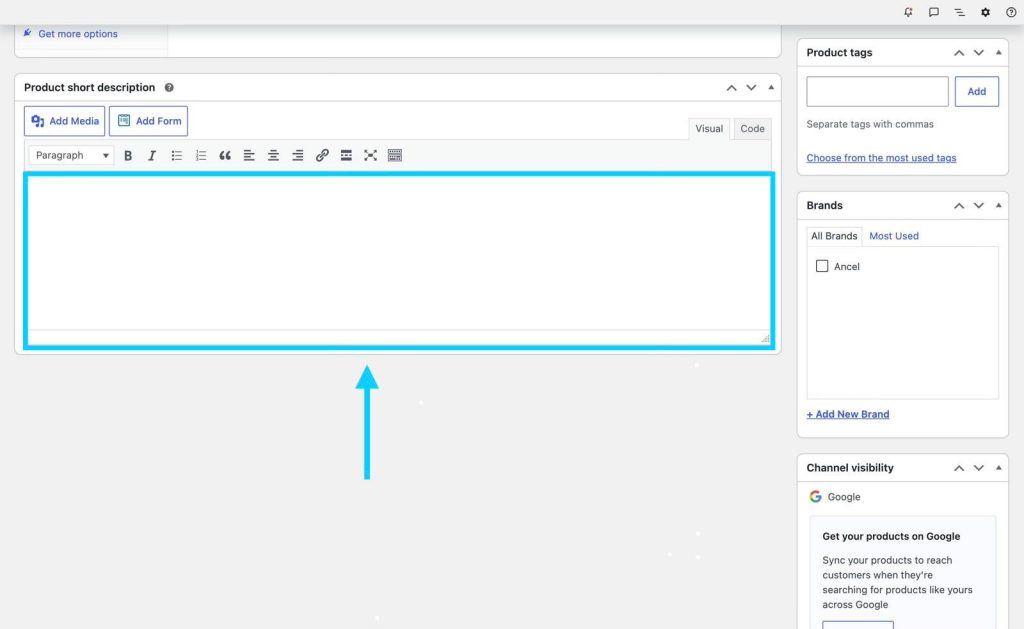
The short description appears near the product image and pricing section at the top of the product page.
This should be a brief summary highlighting the most important information about the product.
Example:
Short Description:
“Durable stainless steel water bottle designed to keep beverages cold for up to 24 hours. Perfect for travel, work, and everyday use.”
The short description should quickly explain the main benefits and encourage customers to continue reading.
Step 5: Add Product Images
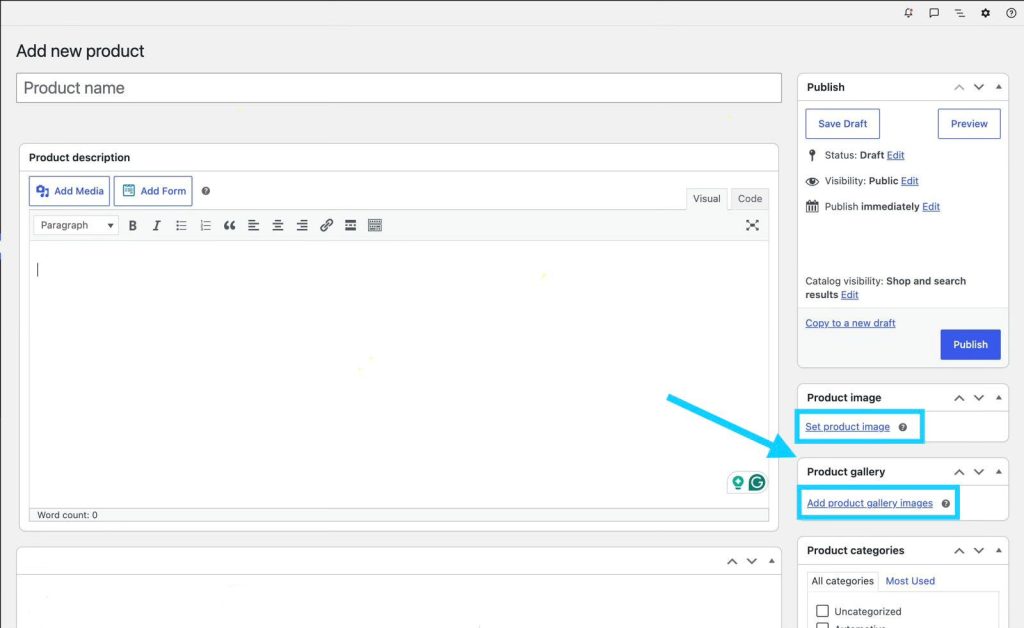
Product images are one of the most important parts of your online store. Customers rely on images to understand what they are purchasing.
To add your main product image:
- Find the Product Image section.
- Click Set product image.
- Upload a new image or select one from your Media Library.
You can also add additional images under Product Gallery to show different angles, features, or product details.
For best results, use clear, high-quality images with good lighting.
Step 6: Set Your Product Price
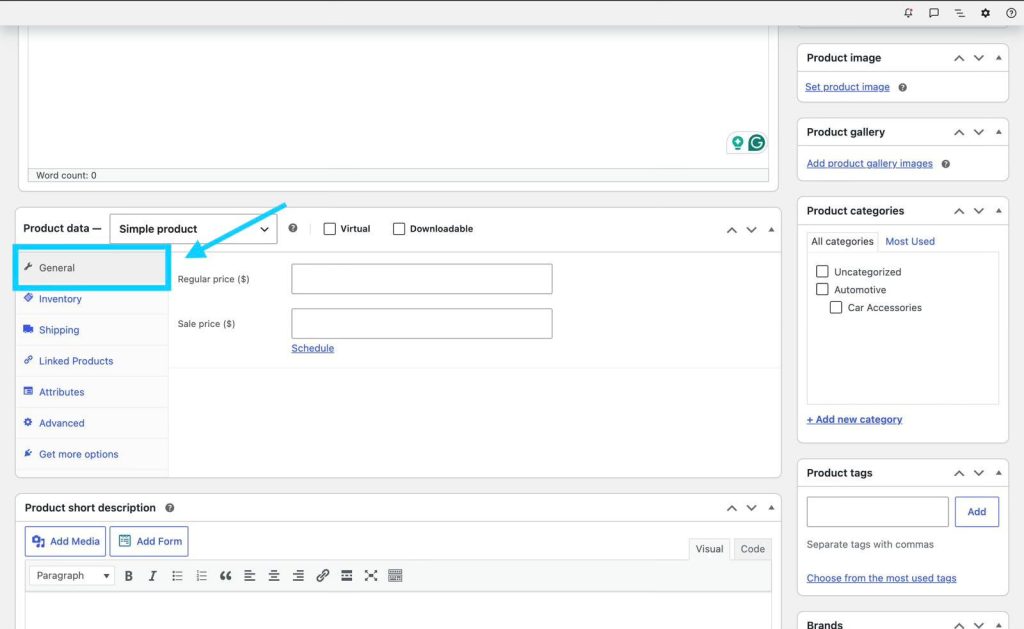
Scroll down to the Product Data section.
Under the General tab, you can enter your pricing information.
Regular Price:
The standard price customers will pay.
Sale Price:
A discounted price if you are running a promotion.
Example:
Regular Price: $59.99
Sale Price: $49.99
WooCommerce will automatically display the sale price when active.
Step 7: Add Inventory Information
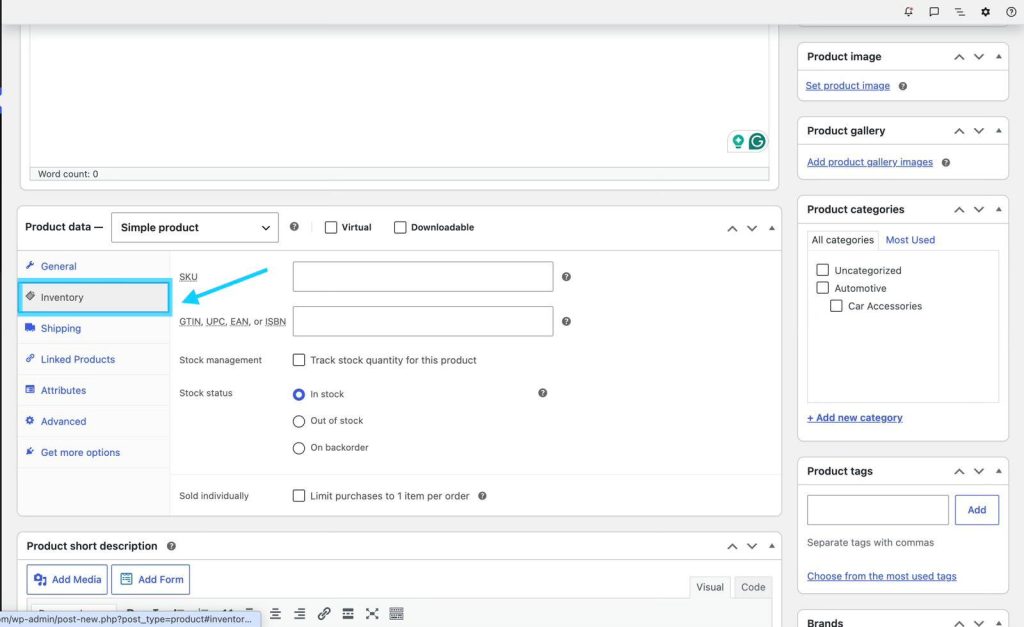
Click the Inventory tab under Product Data.
Here you can manage your product stock information.
Important fields include:
SKU (Stock Keeping Unit):
A unique identifier for your product. SKUs help with inventory management, especially if you sell many products.
Manage Stock:
Enable this option if you want WooCommerce to automatically track inventory levels.
Stock Quantity:
Enter how many items you currently have available.
Stock Status:
- In stock
- Out of stock
- On backorder
Keeping inventory updated helps prevent customers from purchasing unavailable products.
Step 8: Add Shipping Information
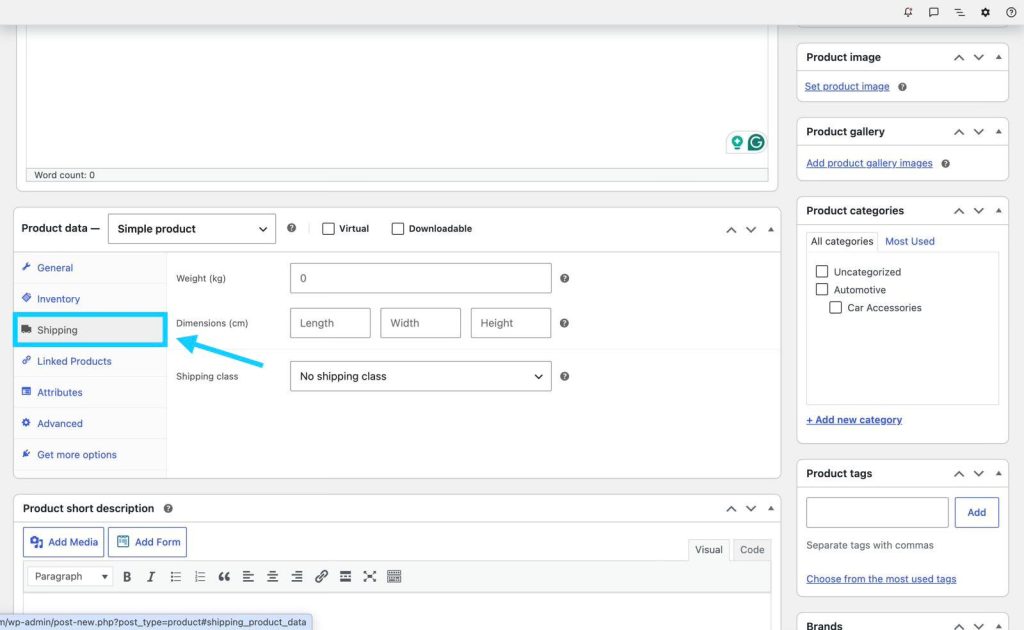
Since this is a physical product, shipping information should be completed.
Under the Shipping tab, you can add:
- Product weight
- Product dimensions
- Shipping class
This information can be used by shipping plugins and integrations to calculate accurate shipping rates.
For example, shipping providers such as Canada Post, UPS, or FedEx may require product weight and dimensions to calculate shipping costs.
Step 9: Select Product Categories
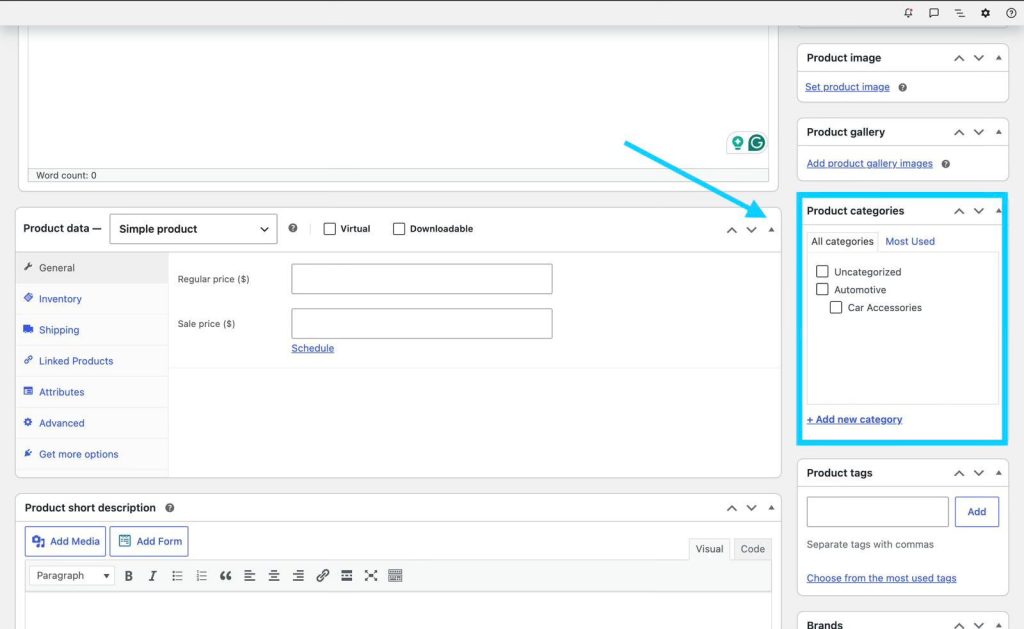
Product categories help organize your online store and make it easier for customers to browse.
On the right side of the product editor, select an existing category or create a new one.
Examples:
- Electronics
- Clothing
- Home & Garden
- Accessories
- Kitchen
Organized categories also improve your website navigation and SEO.
Step 10: Add Product Tags
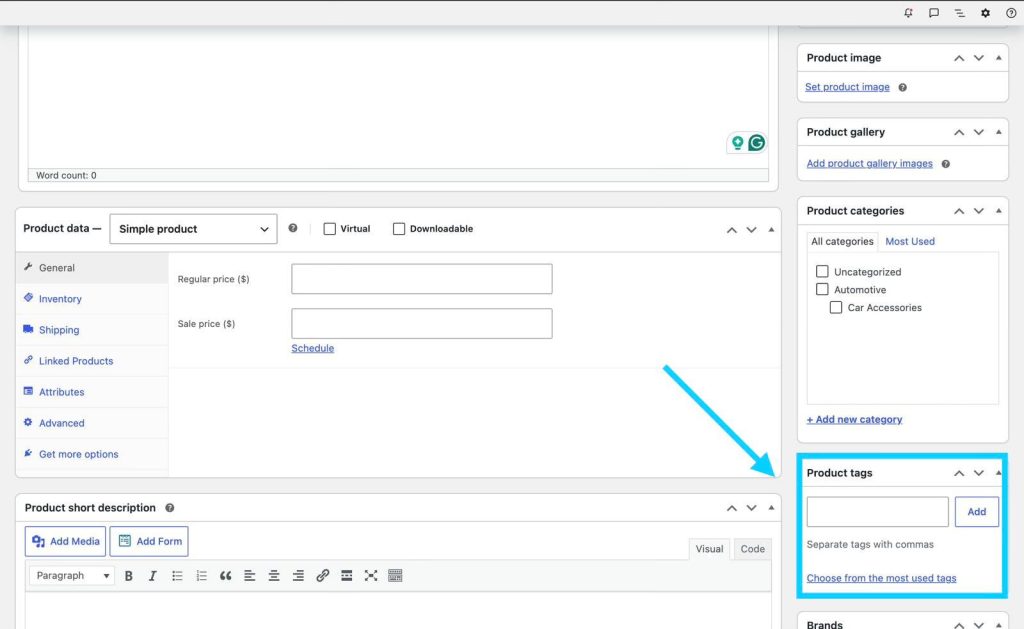
Product tags are optional but can help group related products together.
Examples:
- Wireless
- Outdoor
- Premium
- New Arrival
Tags can help customers find similar products within your store.
Step 11: Optimize Your Product for SEO
Before publishing your product, optimize the page for search engines.
Some important SEO practices include:
- Use descriptive product titles.
- Write unique product descriptions.
- Add keywords naturally throughout the content.
- Add image alt text.
- Use clear product categories.
- Include detailed specifications.
Optimized product pages can help your products appear in Google search results and attract more customers.
Step 12: Publish Your Product
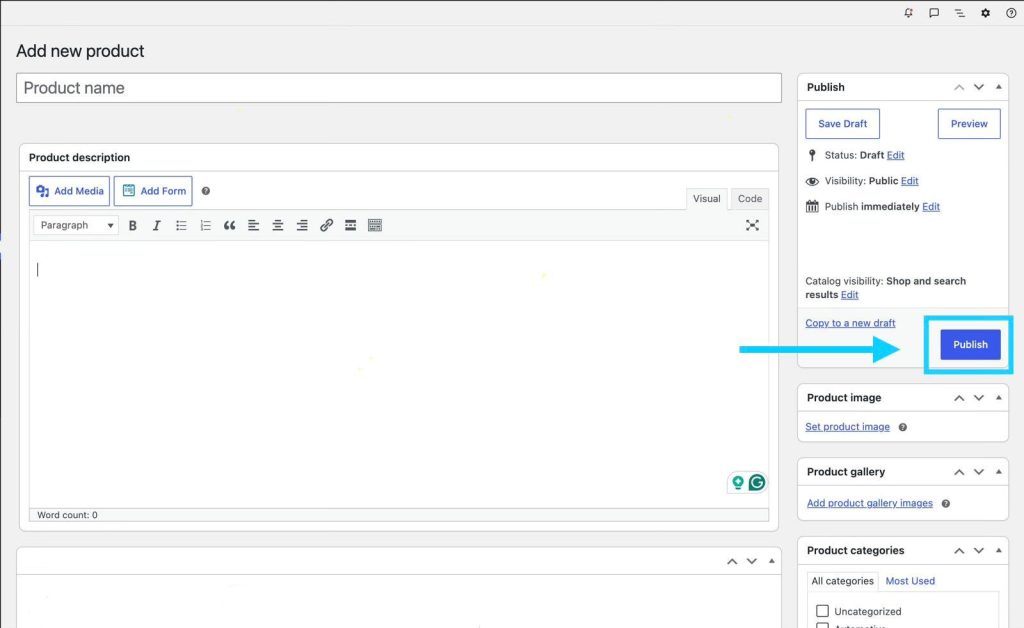
Once all product information has been completed, click the Publish button in the top-right corner.
Your product will now be live on your WooCommerce store and available for customers to view and purchase.
Conclusion
Adding a physical product to WooCommerce is a simple process once you understand the product editor. By creating detailed descriptions, using high-quality images, setting accurate pricing, managing inventory, and adding proper shipping information, you can create professional product listings that provide a better shopping experience.
Taking the time to properly set up each product can help improve customer trust, increase conversions, and make managing your online store easier.